Sections
IntelliPRIMA has the following technical requirements:
Windows
95, Windows 98, Windows NT/2000/XP/7/8/10 PC with an available serial or USB port
CDQ Prima series ISDN audio codec with rear-panel remote control
USB or Serial cable connection between PC and Prima
NOTE that the CDQ Prima units WILL NOT WORK with standard USB to Serial converters or
standard serial cables...
see the remote-cables page for more information.
Application Setup
Simply download the IntelliPRIMA package from the 'download and online ordering' section of this site and start the installation process by double-clicking on the 'IntelliSetup.exe' file. This is a self-extracting ZIP file, which will uncompress the files into a directory of your choice. After the unZIP is complete, double-click on the 'setup' file in that directory.
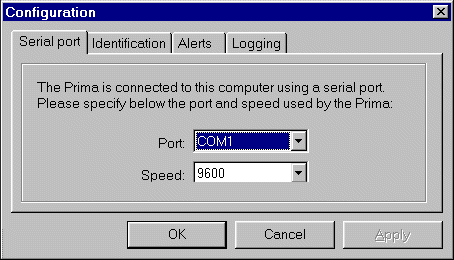
When you run IntelliPRIMA for the first time, the program will search for your CDQ Prima on the first serial port on your machine (for our USB cables you'll need to check which Virtual COM port has been assigned to the cable). If the Prima is not found, or you use COM1 for another device - e.g. a modem, a message box appears. Click OK and the Properties screen will appear - you should then select the correct COM port. The default speed setting of 9600 is correct in most instances.
IntelliPRIMA detects the number of terminal adapters (TA's) installed in your CDQ Prima and displays the corresponding number of lines on the main screen.
|
IntelliPRIMA
remote connected to a CDQ Prima 110 |
You can move around the entries in the phonebook by clicking on any entry and then using the cursor up/down keys, or by typing the first few letters of what you are looking for in the search box. The Add/Edit buttons allow you to create a new phonebook entry - this is described in the following section Copy will create a duplicate - useful for creating a second entry, which perhaps uses a different mode. Delete will delete the highlighted entry. Dial will dial the highlighted entry. The Detail button toggles between this simple phonebook view and the detailed view, which also allows direct control of encoder/decoder settings. |
PhoneBook operation: the add/edit screen
|
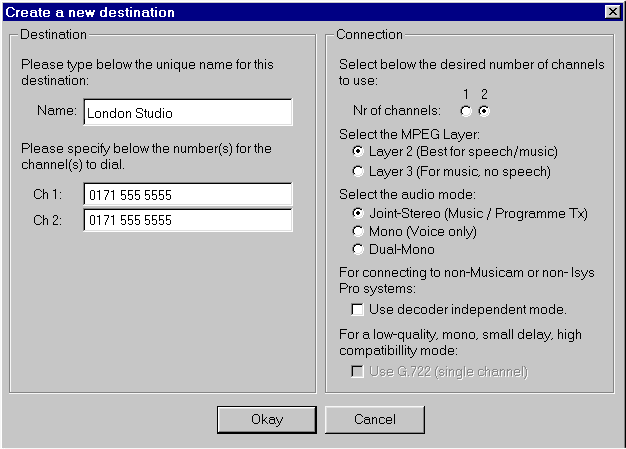
Enter the entry name and phone numbers. In a 2 channel connection, you only need to enter the number in the Ch1: number box - if the Ch 2: box is empty, IntelliPRIMA assumes that both numbers are the same. |
On the right hand side of the screen, you set up the connection details - select the number of lines and the protocol information. H.221 mode is selected automatically for bitrates of more than 128k |
Direct access to encoder settings
By clicking on the 'Details' button at the bottom right-hand-side of the screen, the main window extends to show you the current state of the Prima's encoder/decoder:
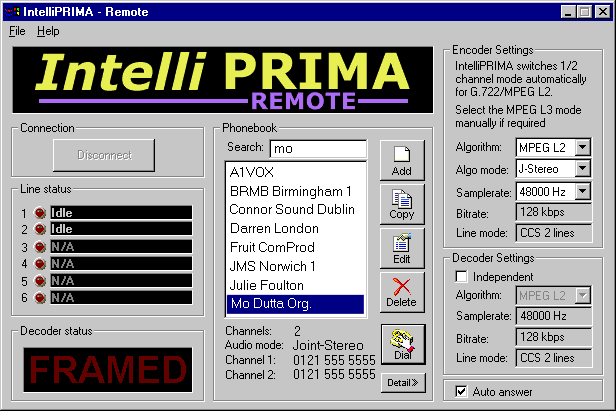
If you have your Prima set up to answer incoming calls, then you will see the auto answer box is checked as above. When an incoming call is detected, IntelliPRIMA will attempt to auto-configure your CDQ Prima settings as follows:
| Encoder algorithm set to: | Auto-detect pattern |
| G.722 | 1 channel incoming: use G.722 |
| MPEG L2 64k | 1 channel incoming: use MPEG L2 64k as set |
| G.722 or MPEG L2 64k |
2 channels incoming: switch to MPEG L2, 48k sample rate, and 128k bitrate |
| G.722 or MPEG L2 64k |
More than 2 channels incoming: switch to MPEG L2, 48k sample rate, switch to H.221 mode and appropriate bitrate |
| MPEG L2 128k | 1 channel incoming: switch to MPEG L2 64k bitrate mono mode. |
| MPEG L2 128k | 2 channels incoming: Stay as is |
| MPEG L2 128k | More than 2 channels incoming: switch to H.221 mode and appropriate bitrate. |
| MPEG L3 | Stay in MPEG L3 mode as set, and adapt bitrate for number of incoming channels. |
You can change the encoder/decoder settings at any time, whether connected or not, whenever such a change makes logical sense! For example, in a 128k connection, you will be able to change between mono/joint-stereo modes.
IntelliPRIMA
can be set to provide an Audio/Visual alert of incoming connections... for
people who
are too busy drinking tea, to watch the screen all day!!
Click File, then properties and in the configuration window, select the alerts tab:
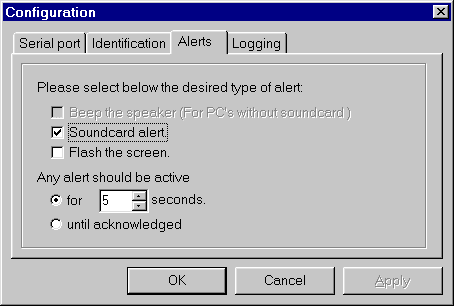
Select the combination of alerts that you want as follows:
- Beep speaker - for PC's without soundcards only... you have to deslect the 'soundcard alert' option first
- Soundcard Alert - plays a repeating sound on your PC soundcard
- Flash screen - flashes screen colour.
You can then either set the duration of the alert, or select 'until acknowledged' - in which case, the alert continues until you click on the acknowledge box that will appear.
Logging and other setup options
The following addtional settings are available from the configuration screen, reached via the File-Properties menu:
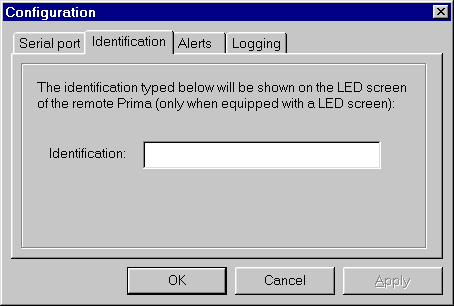 |
The identification string that you enter here is displayed on the LED section (VU meters) of a remote CDQ Prima device that you connect to... this is only available on CDQ Prima x20 models, not x10 which do not have VU meters. |
| IntelliPRIMA maintains a logfile of incoming and outgoing connections. This logfile is stored in the program directory. The default options are normally fine. | 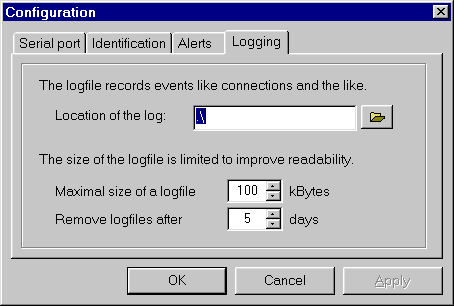 |

